Skincare Favorites – Updated!

It has been too long since the last Skincare Favorites post I shared. I’m still obsessed with skincare and love trying new products so obviously I have some new finds to share!

One thing I need to start doing is actually finishing products up. I threw away an upsetting amount of expired products recently. With this goal in mind, there will be some Project Pan updates coming soon! If you’re with me on this, try and finish up some of your products too and share with me in the comments 🙂 I’m interested to see if I’m the only one who does this lol

Cleansers

  • The Body Shop Tea Tree Skin Clearing Facial Wash

This cleanser is definitely my go to. My skin has significantly cleared up since using this and i notice less breakouts in general. I love using Tea Tree oil in my skincare especially for acne. I definitely recommend trying this cleanser, it’s relatively inexpensive and lasts so long!

  • Pore Steam Cleanser – JJ Young

This was given to me as a gift and is an interesting experience to say the least.. When you first use this it looks like a regular exfoliating cleanser but after letting it sit you really do feel the steam effect. I’m not sure how effective it has been for my skin, but i do really enjoy it.

  • Absolue Cleanser – Lancome

I received this as a sample and have enjoyed using it. I’m not sure if I would re-purchase as there are cheaper options I enjoy just as much. Also, if you’re sensitive to fragrances in skincare I would pass on this one. It’s not a strong fragrance but it is still present.

Toners

  • Tea Tree Skin Clearing Mattifying Toner – The Body Shop

I purchased this to go with the cleanser and love it so much. This is my only toner favorite at the moment because it’s all I use. Body shop skincare gets slept on!!! Try some out and let me know your favorites from there 🙂

Serums/Facial Oils

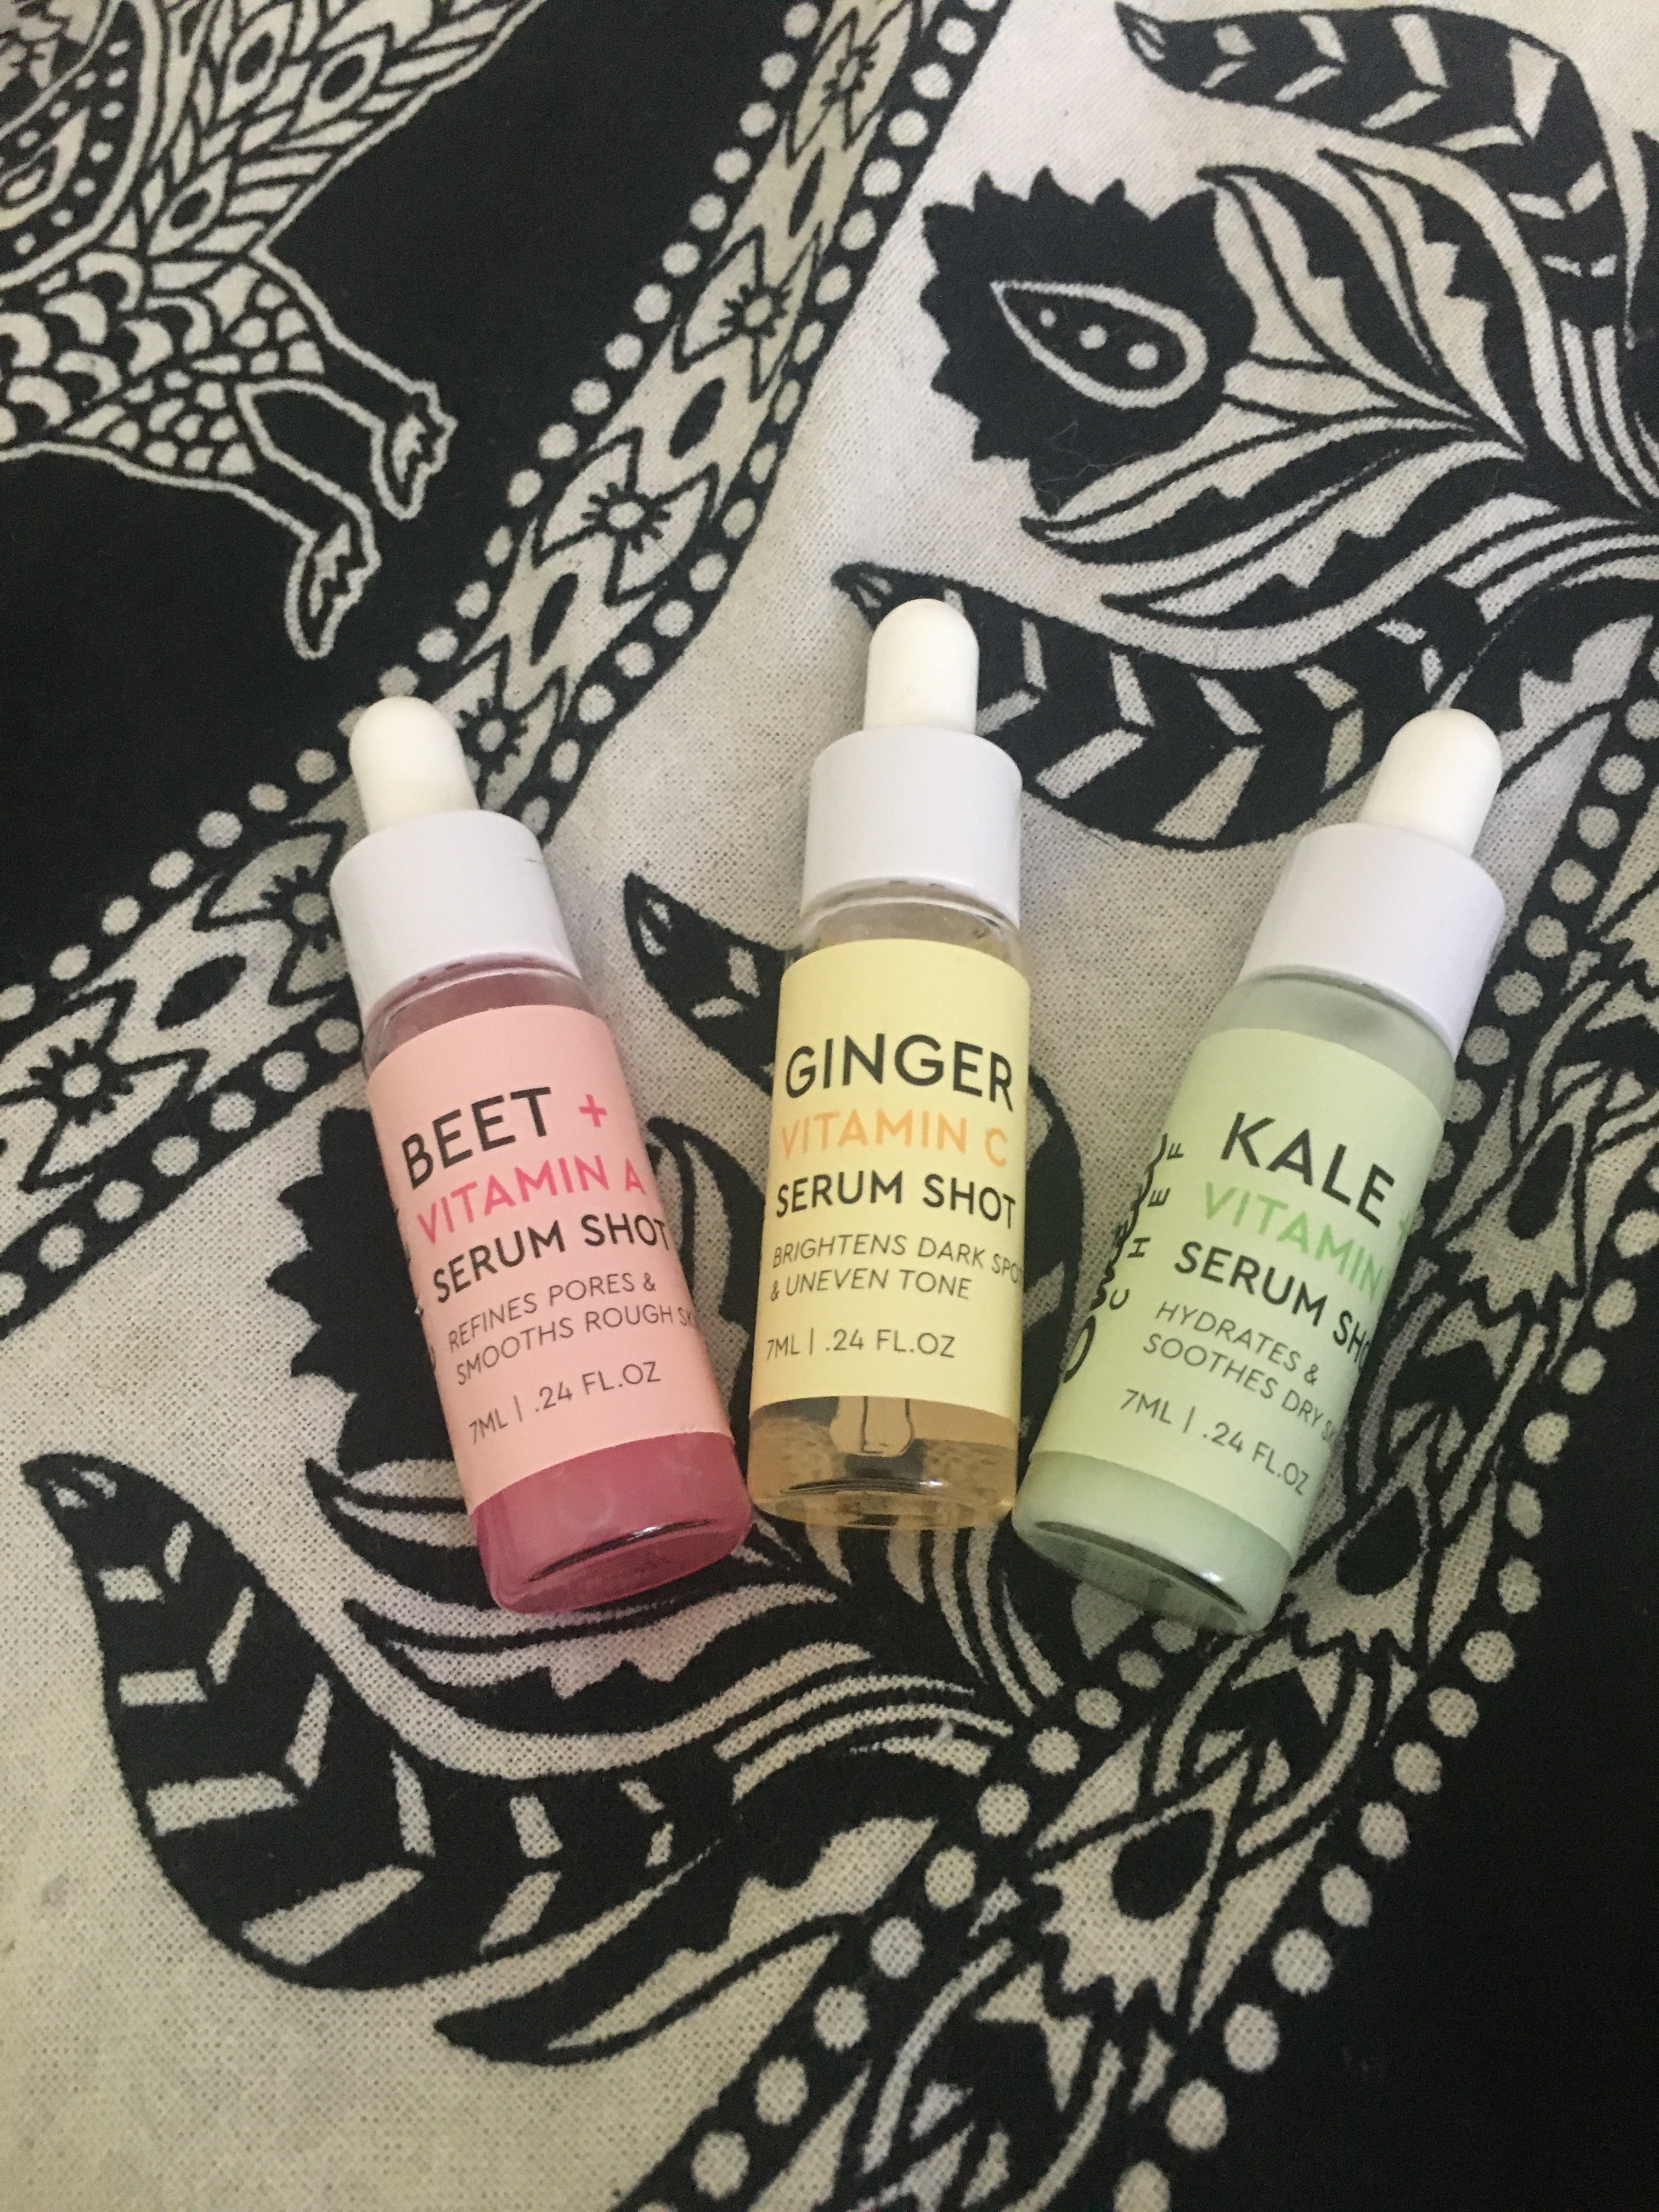
  • Beet + Vitamin A Serum Shot – Sweet Chef
  • Ginger + Vitamin C Serum Shot – Sweet Chef

I received three samples in a gift set around the holidays and have been using the crap out of them! All three of them work great but these two definitely I will repurchase. The beet serum is for refining pores and smoothing skin, the ginger for dark spots and tone. If you’re interested in trying these I would definitely look for the gift set so you can experience them all!

  • Hemi-Squalane 100% – The Ordinary
  • Hyaluronic Acid B5 – The Ordinary

I also have been trying a lot of products from the Ordinary, they have some awesome affordable products. Hemi-Squalane is under $10 and a great moisturizing serum. It can help your skin retain more moisture, absorbs easy and prevents moisture loss. Hyaluronic Acid is another great moisturizing option, I mostly use it when I derma-roll. I will post a skin care routine too including my derma-rolling.

Moisturizers

  • Doll Face Face Cream – Truly Organic

Truly is a brand I have to admit I found through Tik Tok, I haven’t been able to stay off that stupid app lol. This moisturizer isn’t heavily fragrances and feels amazing on the skin. I love how long the moisture lasts! They have a lot of other great affordable skin care options as well.

  • Rose Deep Hydration Face Cream – Fresh

I fell in love with this the first time I used it. I alternate between both these moisturizers in my morning and night routines. This is rose scented so again if your skin doesn’t love fragrances this may not be the best option. Along with the lovely scent it is very hydrating and absorbs nicely into the skin.

Eye Cream

  • Boosting Contouring Eye Mask – Tata Harper

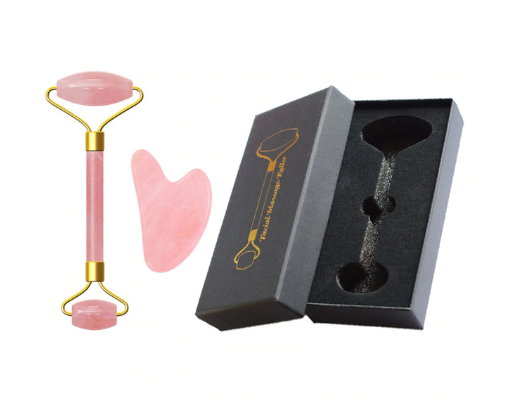
At the moment this is my favorite product for my eyes. At this step I’m usually applying product with a jade roller, it is so refreshing! This is very hydrating and you really only need a little at a time. Even though it is a little pricey I feel like it lasts forever.

  • Extra Eye Repair Cream – Bobbi Brown

This is another super hydrating option. I definitely recommend using an eye cream in your skin caffe routine at every age. It doesn’t have to be an expensive product, but I do recommend these as an investment, they really do last forever.

Products I Didn’t Love

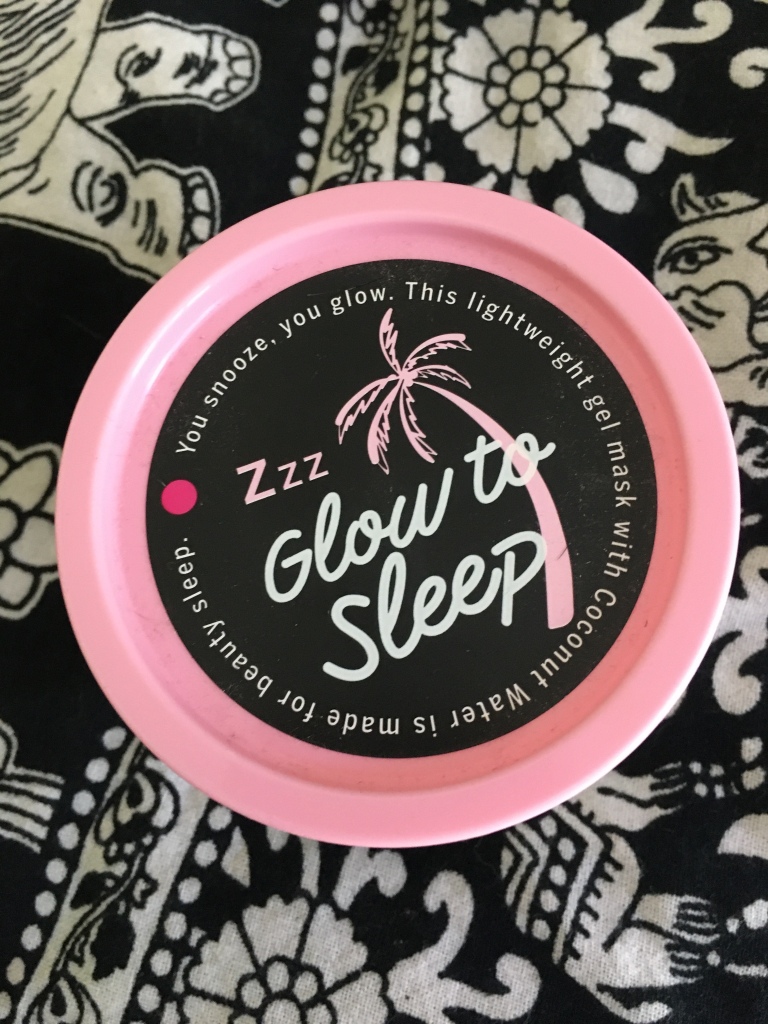
  • Glow To Sleep Mask – Pink Beauty. This mask isn’t the worst one I’ve used but it just felt a little sticky and is overly fragranced with artificial coconut scent. I still use it overnight occasionally but wouldn’t repurchase.
  • Sublimage Exfoliator – Chanel. I was slightly disappointed with this product. If you enjoy a very gentle exfoliator you would probably have a better experience but I tend to prefer something more abrasive. The vanilla scent is light and pleasant but I just felt for the price, the granules weren’t doing much.
  • Dramatically Different Hydrating Jelly – Clinique. This is another product that kind of disappointed me. I love the original dramatically different moisturizer but this formula did not work for me. The jelly on my skin felt very sticky and didn’t really absorb well into the skin. In this case, I would stick to the original product.

I hope you guys enjoyed my skincare favorites and ( not so favorites) Like I said, If anyone is interested I can do a post on my skin care routine and also my hair care routine! Share some of your skincare favorites in the comments, I love trying new products.

Get Snatched Quick! Easy Everyday Makeup

It’s been quite a while since my last makeup tutorial which got me thinking about the ways that my everyday routine has changed since then. What kind of a friend would I be to y’all if I didn’t share my new tips and tricks with you.

So, here’s my 0-to-100 get snatched tutorial. I hope you enjoy 😉

If you missed my last Everyday Makeup Tutorial, check it out!

Get Snatched 101

Brows

So, as usual I’m starting with my brows (if you keep up with my tutorials this is common). I want to start experimenting with different makeup routines, maybe starting with my face or eyes.

I recently received the Anastasia Beverly Hills DipBrow Pomade so I have *temporarily* replaced my ELF pomade. Not hating on the ELF pomade whatsoever, it’s only $3 and slays but… the ABH has been a nice change recently and I’ve been feeling like my brows have been extra snatched. Since my last routine I’ve ditched using a pencil, I just feel it’s an extra product I went through so quickly and didn’t really need.

Same process as before (check out an in depth brow tutorial here). I start by outlining (veeerrryy lightly) the desired shape for my brows, I tend to go for an arched shape but go with whatever suits your face. I set my brows with the Milk Kush Brow Gel (another new product for me). I have been loving this brow gel, it holds my brows all day without getting crusty or crunchy (if you know you know..) it also adds a little tint to make your brows look fuller.

Milk Makeup Kush Fiber Brow Gel Review | Life With Kendal

Sometimes, if I’m feeling like the ends of my brows aren’t dark enough, I go in with this brow powder by Kat von D. I was skeptical about this at first as it has a little shimmer to it, but I find it looks lovely on the face and that it the shimmer doesn’t show. This brow powder is also only $8 so snatch it up especially if you like more natural brows. (Ur welcome luv)

I know this brow portion is getting a little lengthy but I promise it’s worth it. Feel free to alter the routine to work for you! If you already have nice full brows skip the pomade and just use gel.

Lastly, I carve out my brows with concealer BUT now I’ve learned from previous mistakes to only use a concealer on the bottom of your brows. I used to use it for the top as well but foundation works better (concealer can make the top of the brow not blend as well, especially if it’s lighter!)

So carve out (just the bottom for now) and at this point I usually just cover my whole eye lid with the concealer and blend it out. The concealer I’ve been using is the Colourpop No Filter concealer (I’m pretty sure I use the lightest shade as I love to highlight with it).

 This concealer is pretty good, definitely not one of my favorites. I don’t love the consistency so I mostly just use it for my eyelids and brows.

Eyes

We finally made it past the brows! Next I usually do my eyes, just in case I mess up or don’t like how it looks I don’t ruin my whole face. For this everyday routine I’ve been using a palette that was gifted to me over the holidays and I have been loving. It’s the Oracle palette by Deck of Scarlet. I had never heard of them prior to this palette but I am in love with the brand so much! The quality of the Oracle is amazing, colors are pigmented, shade names are cute and the packaging is adorable.

I like how they offer palettes with different themes and influencer collaborations. I believe Deck of Scarlet offers subscription options, to get new makeup in monthly shipments. If you are interested I can look into this more and maybe try out their subscriptions service.

For this look since I was going for “natural”, I started with the shade ‘Sacred’ which is a nice orange-brown shade in the crease to warm it up. I further darkened the outer corner of the crease with ‘Omen’ and highlighted the center of my lid and my brow bone with ‘Tarot’ and ‘Fortune’. (Told you the shade names are amazing)

Finish off the eyes by blending a mix of ‘Sacred’ and ‘Omen’ under the bottom lash line and smoke it out with a fluffy brush. I did my signature large winged liner (let me know if you want a post on winged liner!!) For liner I’m using the Tarteist Double Take Eyeliner . I love this because the applicator makes wings easy and the formula lasts all day, no smudging! Lastly, a little pencil eyeliner in the water line (keep to outer corner only) and some mascara.

One thing I haven’t changed since my last tutorials, Milk Kush Mascara. My Ride or Die favorite makeup product. Makes my lashes so long and defined. I’ve gone through TOO MANY bottles of this.

But that’s it for the eyes, keepin’ it simple…

Face

I always start my face off with a moisturizer, my favorite right now is the Doll Skin Face Cream by Truly Beauty. I’m embarrassed to admit it but I did find out about this brand from TikTok…. don’t judge me, I know I’m too old for TikTok lol.

Doll Skin Face Cream– Truly

Truly has some awesome products, the infamous Unicorn Fruit Body Butter, but also so many other products that aren’t toooo expensive. I love how soft and smooth this cream makes my face, and it’s not so heavy that it messes with my makeup application.

While my moisturizer sets in, I moisturize my lips with the Kush Lip Balm in green dragon by Milk. I know there’s a theme here but I really love their Kush line. This lip balm is super moisturizing and refreshing, I love the fresh scent.

Milk Makeup on Instagram: “Kush Lip Balm and Kush Lip Glaze got ...

I follow my moisturizer with a primer, recently I’ve been using the Smashbox Primerizer. I love this because it gives me a little extra moisture, which I’ve totally been needing this winter! I got this primer from a gift set that came with a primer spray and their Photo Finish Primer. The gift set is a good investment to sample a few different primers and find what works with your skin! It was pretty affordable and the primer spray is great to have on hand.

Following primer, I go in with my foundation, still the Estee Lauder Double Wear. I don’t know if I will ever replace this foundation as it works so well with my skin. I’ve talked about this so much so I’ll keep it short but definitely try it out. I apply this all over my face with a flat topped foundation brush.

The next thing I do is conceal the areas I want to highlight. For this, I use the Tarte Shape Tape Concealer a few shades lighter than my foundation. I apply this under my eyes, the sides of my nose, in between my brows, the center of my forehead, around my mouth and on my chin. This brings forward all these areas, shaping your face. I blend my concealer with the same brush but you can also use a beauty blender.

NARS Soft Matte Complete Concealer VS Tarte Shape Tape | Shape ...

I also like to cream contour, I usually layer my contour as I feel it gives my face more dimension. I use a foundation darker than my skintone. I have been using the Becca Aqua Luminous Perfecting Foundation. The applicator on this makes it easy to apply as contour and it blends out seamlessly. I apply this under my cheekbones, along my temples and hairline, my jawline and to nose contour (let me know if you want a post explaining my nose contour!)

Product Love: Becca Aqua Luminous Foundation | Alexandria Stylebook

Sometimes you can find this foundation at TJ Maxx or Marshall’s so keep your eye out for it to get it for a good price!

I set my foundation with the Airspun loose translucent powder. This powder is super cheap on Amazon and really blurs the face! It is such a big container for the price it has lasted me months! I apply this to my face with a powder puff, baking the parts of the face we highlighted.

While our bake is setting, I go in and layer my contour/bronzer. I use a big fluffy bronzing brush to apply my Hoola bronzer in the same place we applied that Becca foundation. Make sure you are blending this thoroughly so you don’t look crazy. If the contour looks too dark, blend it with some of the translucent powder or go over it with the brush we used for foundation.

Benefit Hoola Bronzing Powder | ASOS

I finish my contour with my trusty, beloved Physicians Formula Butter Bronzer. This stuff is a drugstore must. It smells like coconut and has several different color options. I use this with the brush that came with my Hoola bronzer but any thin contour brush will work.

New Shades! Physicians Formula Butter Bronzers

I also use the Butter Bronzer to go over the nose contour and warm up my forehead and temples.

I add a little more color to my face with blush. I used to be scared of blush and now I have a little bit of a heavy hand when using it. The blush I’ve been loving is the Lime Crime Wifi Blush. This is a cream blush but I promise it blends out well. I use a very large powder blush, smile and apply blush to the apples of my cheeks, blending it into my contour.

SALE CLEARANCE ITEMS ~ Beserk Discounted Sale Products – tagged ...

We’re almost done guys I promise lol.

The next thing I do is go over all of this powder with a setting spray. I feel like setting spray helps melt the powder into the skin, so we don’t look cakey. The setting spray I’ve been using is the Mario Badescu Facial Spray in Lavender and Chamomile. This setting spray smells so good and is very refreshing. I go a little hard with this, making sure to get it all over the face.

Facial Spray with Aloe, Chamomile and Lavender

Before the setting spray fully dries, I like to apply my highlight. This makes it just a little more popping. I use my Morphe highlighting brush to apply my highlighter. This highlighter y’all need to go get ASAP. It’s the Laura Geller Dripping in Gold set. This comes with THREE super pigmented highlighting shades and is less than $20!!!

Laura Geller Dripping In Gold Illuminator Palette | Laura geller ...

I’ve been using a mix of the two gold shades for my cheekbones and then the lightest shade for the inner corners of the eyes, brow bones, bridge of my nose and cupid’s bow.

Lips

We’re finishing this look off with some poppin’ lips to tie everything together. This part of the routine hasn’t changed too much since my last post… actually hasn’t changed at all. I still use my same Nude Nyx lip liner and Maybelline liquid lipstick in ‘Driver’.

The biggest change here is my new favorite lip gloss, the Lime Crime Wet Cherry Gloss in Slime. I was a little hesitant with this at first because of the neon green glitter, but it’s actually very flattering on the lips. This gloss also smells amazing and photographs even better.

wetcherry hashtag on Twitter

Cherry Slime Lime Iridescent Shiny Liquid Lip Gloss - Lime Crime ...

And, we did it!!!!! We finally finished the look. I promise once you get used to it it doesn’t take very long. I complete this look in less than an hour.

I hope you enjoyed, and make sure to tag me if you recreate the look.

Let me know any other posts that you would like to see!

Thanks for reading,

-Frankie xoxo

Bougie on a Budget: My Favorite AliExpress Finds

If you guys aren’t familiar with AliExpress…. smh… go check it out now!! It is a shopping site/app that offers TONS of vendors based out of China. The products are super affordable so if you are patient to wait for shipping from China (usually free) to get a good deal, then this is for you luv. They also offer coupons all the time, as well as minigames where you can earn extra coupons!

If you sign up with my link and you automatically get $19 worth of coupons, trust me, $19 can get you a lot on this site! https://a.aliexpress.com/_stziYT

The one downside to this site is that not all sellers are reputable, as in most situations. So my biggest recommendation is prior to purchasing just check the seller’s rating and the actual product reviews. Any product that has been purchased by someone at some point will have reviews, most with pictures as well, so you will be aware what you are purchasing.

I have been shopping this site for legit years and  there is like never a time where my cart has less than 30 items in it.. so I figured it’s about time to share some of my favorite purchases, just wait till you see the prices!!!

CLOTHES

Buying clothing from this website can seem tricky, just pay attention to sizing as it can be different. Sellers offer size charts which are helpful but I still stick by checking reviews.

Faux Leather Jacket $13.59

2020-02-06 (6)
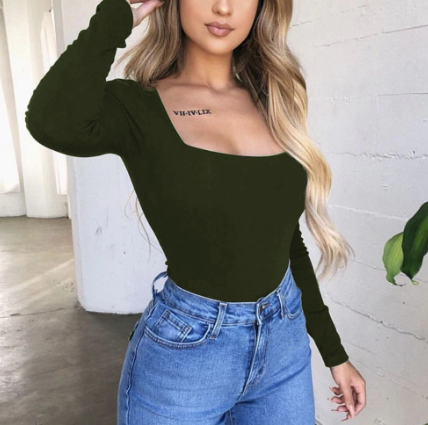
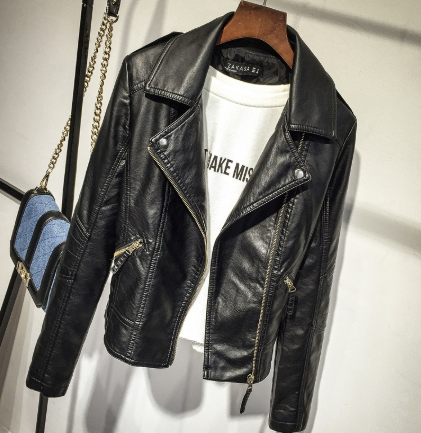
I was hesitant at first purchasing this as I didn’t know what the quality would be, but the reviews were great and I am so happy with this jacket! I had been looking for a faux leather jacket and how can you beat this price?! I typically wear a XS/S and went with a S with this jacket, it fits but if you want some extra arm room or want it a lil over-sized. I got black but it also comes in a cute maroon/wine red that I lowkey need in my life.


Solid Lettuce Trip Crop Top $6.99

2020-02-06 (13)


I love this top SOOO much, it is a little see-through so just make sure you wear a nude/white bra (or f*ck it and wear a cute color bra) Totally worth the price, it is comfy and fits perfect!! I went with an XS in the camel color, it comes in 4 different color options.


Long Sleeve Square Neck Top $6.47

2020-02-06 (17)

This is a serious staple for me, I pretty much wear it to work at least once a week. SO comfortable and surprisingly thick material, there is also a double layer at the chest so it is not see-through. I got a S in black and will be ordering white and red soon.


Jewelry/Accessories

Personalized Name Necklace (45cm) $4.99

2020-02-06 (8)

I wear a lot of jewelry, but also change it up all the time, so it is not practical for me to buy all nice jewelry. This seller allows you to choose a font, metal color and customize a necklace with your name. I also got my sister one and she loves it! Just keep in mind it is not real gold/silver so avoid showers etc.


Hollow Heart Choker $0.66

2020-02-06 (15)


Super cute and is adjustable. Comes in silver or gold (again not real)


BEAUTY/HAIR SH*T

This site is sooo useful for basic things we need that can be taxed when purchasing in store.

MAANGE 12pcs Brush Set $3.16

2020-02-06 (3)
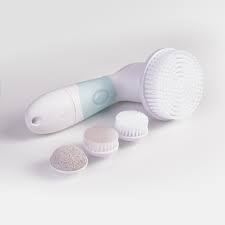
I personally purchased this brush set specifically for the cute lil mini fan brush (ahhmazing for brow bone and nose highlight) but having a ton of extra eye brushes is super handly, especially if you play around with eyeshadow like me and don’t want to ruin your good brushes. Also good for nail art!


DUcare Double-Sided Eyebrow Brush $2.00

2020-02-06 (21)


I bought this brush in 2017 and still use it to this day… that’s kinda scary lol.. but this brush is perfect, I’m so picky with brow brushes and this checks all my boxes


Jade/Rose Quartz Facial Roller $1.82-$6.62

2020-02-06 (23)


Black Fine Tooth Metal Pick Comb $0.73

RANDOM SH*T

5ml Metal Refillable Perfume Bottle $0.75

2020-02-06 (4)
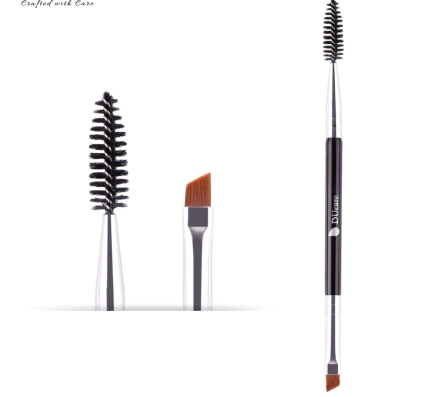
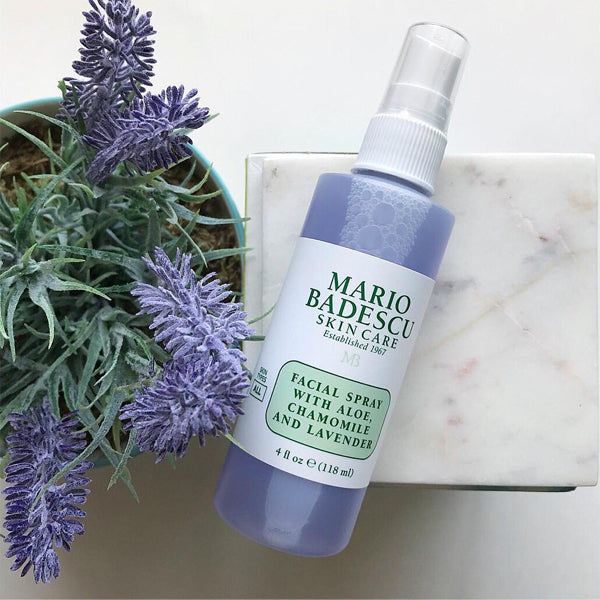
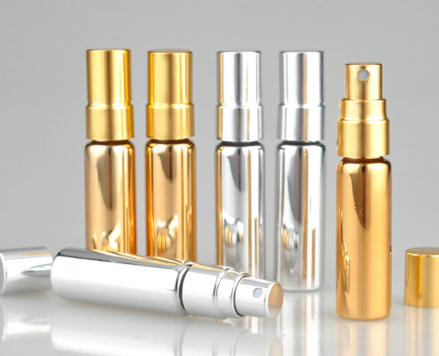
This was a great purchase, I am kind of over the body mist scent, I prefer perfumes that last me through the day. When you buy a nice bottle of perfume, it is not always convenient to carry the whole bottle in your purse. That’s where these lil guys come in. I put these in stockings for all my girls and family for Christmas and they were a huge hit (um and less than $1) They are decent quality and the sprayer works great! Good affordable gift idea (even for yaself)

One of my most boring but also most useful purchases was this set of metal straws. I don’t want to get into the whole plastic straw situation, but I did decide to purchase metal ones for myself. This set comes with 4 straws, 2 straight ones and 2 that have a bend (for shorter glasses). I use these religiously, they even give you a little cleany thingy so they don’t get naaasttyyy.

2020-02-06 (2)This seller has great reviews and offers different options including various colors, more/less straws, and the option for a little bag, which I recommend and wish I had gotten as I would love to keep one in my purse.The best part about these straws? The set I got was only $1.70 and free shipping!

4/8pcs Metal Straw Set


Fun Novelty Socks $1.72

2020-02-06 (10)

NAIL SH*T

Holographic Nail Powder (1G) $1.41

2020-02-06 (19)
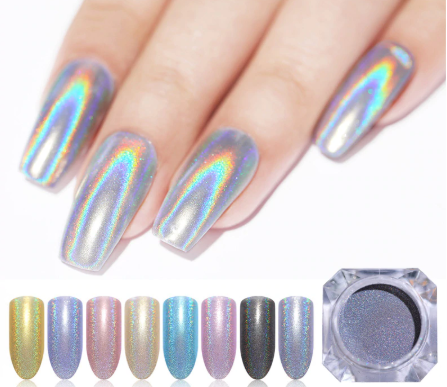
This is one of my favorite purchases period. The small jar lasts a long time and applying the holo is surprisingly easy. I will be doing a post on holographic nails soon so stay tuned! This seller offers TONS of different holo powder colors so stock up.


Rosalind Clear UV Gel Topcoat $1.00

As most of you probably know, I do my own acrylic/gel/dip nails. In my Budget Nails Tutorial, I shared my secret nail supplier (AliExpress). Forreal though, the price of their nail accessories and tools is incomparable to buying it in store. Obviously not everything is GREAT quality, that’s why we read reviews sis.

To see some of my favorite nail crystals see my Budget Nail post 🙂

I hope you guys enjoyed, and that if you didn’t shop Ali before, you’re welcome for putting ya on 😉

I have some items on the way so I will be posting an AliExpress haul soon! Leave a comment if you have any favorites or cool finds from this site!

DIP Powder Nails on a Budget

I have made several posts so far on my at-home nail journey and really have come a long way since I started doing my nails myself. Long gone are the days of waiting hours in the salon and coughing up upwards of $60 for a fresh manicure. Along with the high price tag of getting your nails done in a salon, it also can be unsanitary.

Salons aside, doing your nails at home can be super fun and save you tons of money! As a beginner, it can seem overwhelming and honestly if you aren’t sure what to buy or where to buy it, this can be super expensive! We’re trying to save money here ladies!

So this beginner friendly post is here to share the tips I’ve personally found to begin doing your own nails on a budget! I will also link some affordable nail products I have purchased myself! Enjoy loves!


Nail Supplies

The most important part of doing your own nails is the actual nail-building supplies. Since this post is focused on dip powder, that is what I will focus on (let me know if by comment if you are interested in a gel and/or acrylic version as well :))

The easiest way to start using dip powder (without breaking the bank) is definitely a beginner kit! I have tried several and by far this one is my favorite!

Kiss False Nails Salon Dip Professional Dipping Kit $11

Image result for kiss beginner dip kit
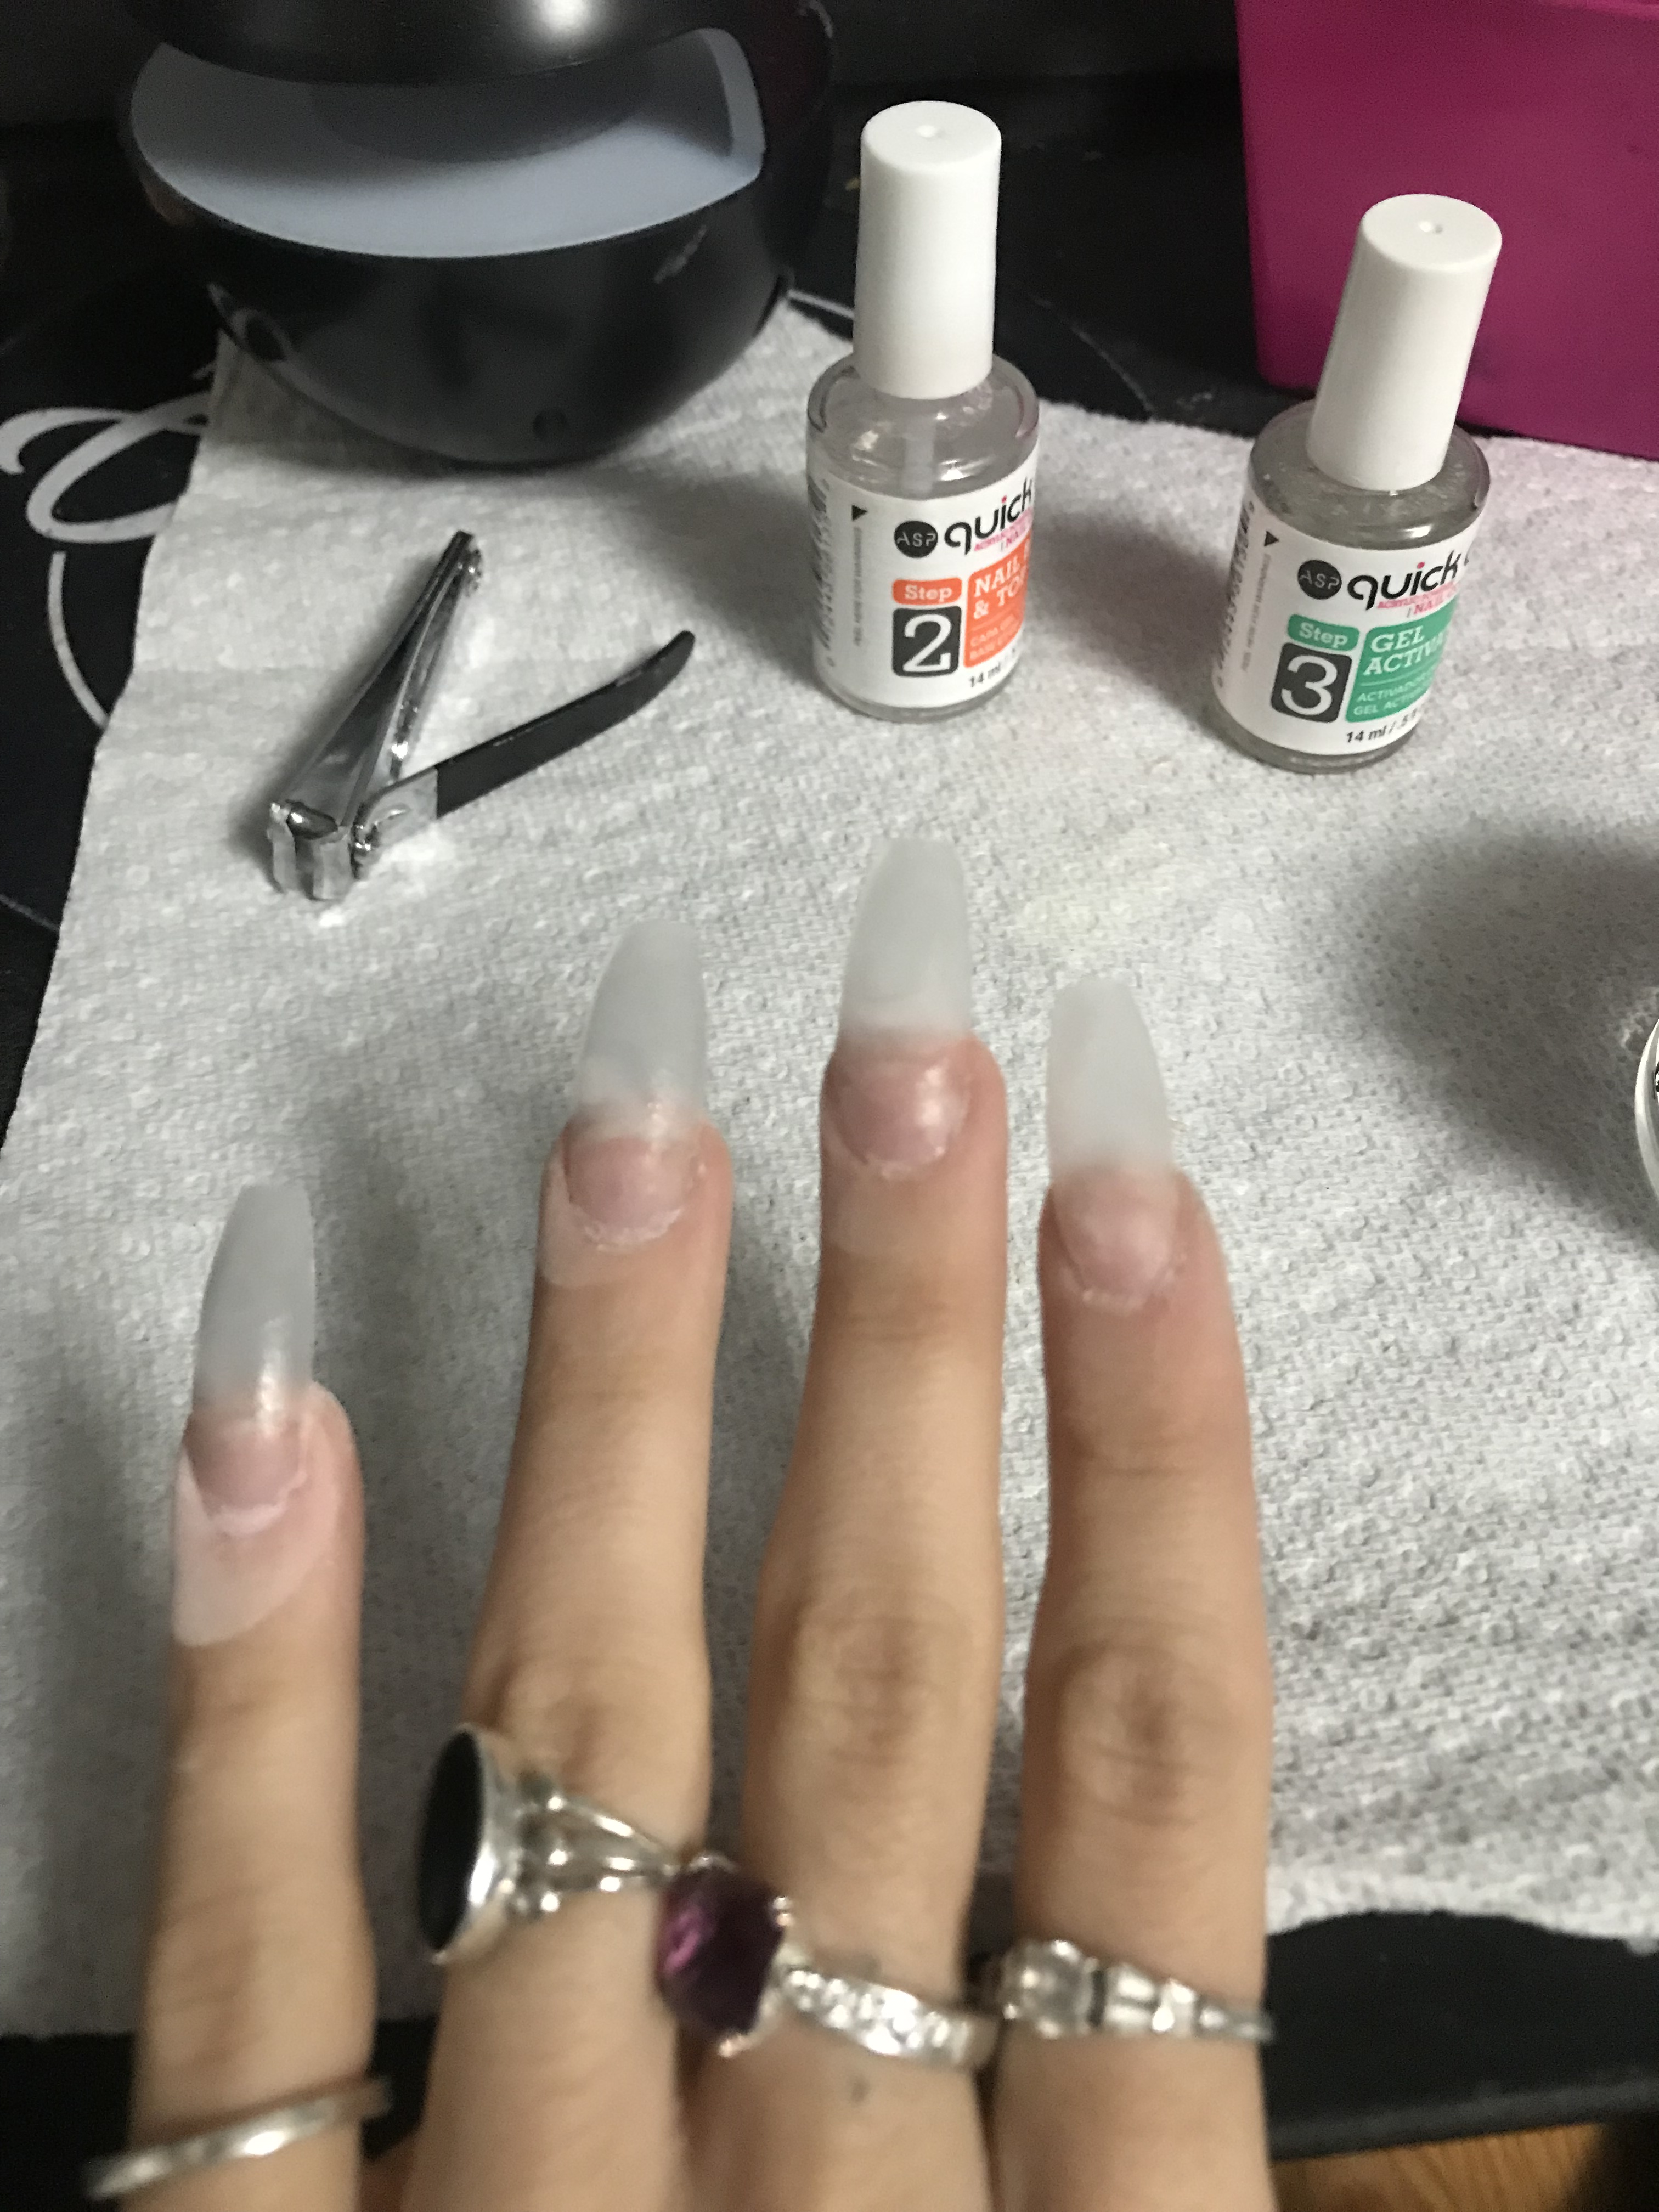
This kit is super affordable (literally less than $12!!!!! what u waiting for sis) and it comes with everything you need to begin your dipping journey! The most important items being obviously dip powder, brush on gel and an activator. This kit also includes nail tips for my long nailed sistahhss like myself but they are totally optional. My favorite part in this kit that I have found lacking in others is the dip tray. It seems like a small detail but trust me girls it saves you SO much dip powder (and from making a huge mess lol)

I have tried several other kits previously and found this is the best (and most affordable) to begin dipping. Once you have this kit as a foundation, you can purchase any other color of dip powders and re-purchase activator/gel as you run out! Overall a great kit to start out, and it comes with a perfect french-style pink which goes great with the white tips but also can be painted over.

Nail Files or Drill

This is where it is up to your discretion how you want to shape/file the nails. The kit mentioned above does include a nail file (not the best quality tbh) so I recommend purchasing additional nail files of better quality. Here are some of my faves all under $2 (click pics for links if you’re in a shopping mood)!!

ASP Zebra Angle Board Nail File 180/180  Sally’s Nail File $1.50

Beauty Secrets 100/180 Rectangle Zebra Cushion Nail FileSally’s Nail File $0.89

If you are interested in purchasing a drill, which definitely makes your life easier, here is the one I use from Amazon.Electric Nail Drill Professional Nail File Drill Acrylic Nails Kit for Manicure Gel Nail Polish Remover with 1 Pack of Sanding Bands(Pink)

This drill is great for beginner since it comes with several different drill bits and a TON of replacements. It has worked great for me so far and was only $26.99!

-Top Coat, Polish, Bling

The last thing on the list is totally optional and depends on the look you are going for. The look I completed with this kit was a french (I wanted to use the pink included) All I added on top was a top coat and some bling. If you don’t want the pink/french look feel free to top off the dip with a gel or regular polish.

Here’s some of my fave budget-friendly picks

Sally Hansen- Insta Dri Clearly Quick-0.31 fl oz, Size: 0.31 ozSally Hansen Quick Dry Top Coat $3.96

These crystals from Micheals are on the pricier side, but they always have 50% off one item coupons in the newspaper, so stock up on a couple coupons to get them at a better price

Swarovski Create Your Style Xirius Nail Combo, Crystal Ab By Swarovski Elements | MichaelsMicheals Swarovski Crystals $9.99

One of my favorite places to get crystals, glitter and all cute nail things is AliExpress. If you aren’t familiar with the site it is super affordable and based out of China. The prices are great but shipping does take lowkey forever so keep that in mind, but a great option to stock up if you have patience. Here are some of my fave purchases from AliExpress! (ALWAYS look at reviews before purchasing)

Now that we have all the ingredients for poppin’ nails, let’s get started!

DIY DIP Nails

  1. Gently buff natural nail with file to remove excess shine
  2. If using tips, apply tips to nails with nail glue (or skip this step) and shape nails to desired shape

If you are using tips be sure to properly fit to nails to avoid premature lifting. For a chart on nail shapes see my previous post DIY Dip Powder Nails.

3. Now it’s time to dip, the first step is to apply the brush-on-gel to the nails (make sure you do one at a time)

The process is brush-on-gel > dip > brush-on-gel > dip

Repeat this process until nail is as thikk as you want it to be

**Make sure to brush off excess powder in between dips BEFORE adding more                       gel (this will save you from ruining the gel) This kit comes with a small black                       sponge to use but an old (CLEAN) makeup brush works better

4. Once you have built each nail with the dip powder, we apply enough activator to coat whole nail (this can be done to all nails at once)

     5. Now we file, file the nail until it is perfectly smooth, at this point you can also reinforce the shape if it was lost by the dip powder

6.  Now that the hard part is over… time to DECORATE

As I said before, at this point you can paint over nails with a polish, or just                             add top coat and BLING or any other decorations you want.

Here are some of the sets I have done recently!


I hope this post was helpful! Leave me a comment with any questions or any posts you would like from me in the future!

Coming soon: DIY Holographic Nails and Gel Nails for Beginners

Thanks for reading

-Love Frankie

My Quick & Easy Everyday Makeup Look Tutorial

As much as a sister loves full glam, I just don’t have the time (or energy) to do it every day. I commute to university a few days a week, which forces me to drag myself out of bed early and get myself together.

This look has evolved quite a bit over the years and I’ve really mastered my 20-minute natural-glam makeup. I had to share this look with y’all to help out my fellow always-running-late sisters.

Everyday Makeup Routine

1. Eyebrows

The same as with any of my makeup tutorials, this one starts with the brows. I have changed up my brow routine (for the better). I create the shape of my brows by marking 3 points: the start, the arch and the tail/end. To find these points you can use a pencil or other straight object.

Once you have the brow guidelines I use a pencil to outline what I want to fill in. The pencil I have been using is from Sephora, it’s a little light for me which is why I go over this outline with my trusty ELF pomade. I still create hair strokes to make them look more natural & do not draw too close to the brow start.

Once I’m happy with my rough brow outline, I cut and shape with concealer (it cosmetics bye bye under eye) and set the brow with a clear brow gel.

2. Prime & Foundation

I switch up my primers a lot as you may know, today I stuck with my blur stick. Once I apply a thin layer and buff it in with a beauty blender its time for foundation.

I used my Real Techniques beauty blender and my Esteé Lauder double wear foundation in 2W2 Rattan.

I love this foundation because it stays matte and lasts all day!

For concealer, you know the drill with my it cosmetics concealer, i use it to highlight under the eyes and any other high points of the face.

3. Set Bitch

Setting powder is lowkey an inconvenience for me but what can ya do? It’s necessary. I used my Laura Mercier translucent setting powder and the same beauty sponge to bake where I concealed my face.

While I’m baking (lol) I usually bronze up under my cheekbones to warm up the skin before contour. I’ve been uSing this Stila Bronzer in medium and my butter bronzer in deep bronze by Physicians Formula to contour.

I also contour my forehead, jawline and nose.

I used to always skip blush because it scared me, but it really helps with the natural/flushed look i was going for. I’ve been loving this light Tarte blush “quirky” that I got in an Ipsy bag!

4. Eyes

I know what you’re thinking, we didn’t skip highlighter, I just save it for last 😉

For the sake of time, since this is a quick easy makeup look, I kept the eyeshadow very simple.

I literally only used the taupe and brown shades ( Divine & Creation) in my Venus palette on a blending brush to warm up my crease and add dimension. That easy sis.

For the inner corner I used the bronzed highlighter in my ABH Sun dipped Glow Kit.

I decided to not bother with eyeliner today, so I did a quick coat of mascara and popped on these AMAZING Kiss lashes in PageBoy! Guys these lashes are the bomb, seriously, you’ll see.

The lashes were a little long so I did have to trim the inner corner but the end product was worth it.

5. Lips

I pretty much do the same lip routine every day.. I love my nude Nyx lip pencil in Muave and the Maybelline liquid lippy in Driver. It’s the perfect nude on my skin tone and lasts all day!!

6. Highlighter

Finish this ish off with some glow & you are good to go girl. I never can decide on which highlighter to use for the day ( kind of why I save it for last) but I decided to go with an old favorite : the purple and pink shades (Tourmaline & Moonstone) of that same Glow Kit! I applied it to my cheekbones, the bridge of my nose, my brow bones and Cupid’s bow.

And that’s the whole look! I hope some of you try this look out (or atleast the lashes) seriously once you get the hang of it you’ll be out the door & fierce in no time 😉

Xoxo

-Frankie

Project Pan Update January 2019 – Makeup Skincare & Hair

Hey beautiful,

Am I the only one that felt like January lasted forever this year? Not saying it was necessarily a bad month at all, just somewhat dragged for me.  As my winter break from college is ending, and I am starting up my classes it has definitely started to pick up as I am growing super busy!

Anyways, one thing I’m trying to push this year is finishing up my products! I have so many makeup, skincare and hair products I have nowhere to put them, and since I’m moving soon I really need to minimize my collection.  As much as I love buying new products, I’m not as efficient with finishing them, which brings us here.. I’ll be sharing all the products I’ve emptied this month and my final thoughts on them.

01. Suave Professionals Almond + Shea Butter Shampoo & Conditioner $3

I purchased this set of shampoo and conditioner specifically because it is for dry and damaged hair.  I actually have pretty long hair ( it reaches my lower back) and through the years my hair has been through it, with all the times I’ve dyed it and fried it with blow-dryers and my straightener.  I finished up the shampoo a while ago and just recently emptied the conditioner, I loved the clean scent it left on my hair and it kept away my frizz leaving my hair silky soft.

suave

Before you jump on this product, upon further investigation to it’s ingredients, it contains Behentrimonium chloride, a skin and eye irritant, and Dimethicone which also may cause rashes and in rare cases hair loss.  While I did enjoy this conditioner I will not be re-purchasing this or other Suave products, nor recommending it.  If you don’t care about the ingredients in your hair-care this still does have some good ingredients but doesn’t fit into my preferences.

Rating: 2/5

02 ColourPop Amber Crystal Collection Setting Spray

This was the first product out of this collection that I have finished, while I didn’t love the other products, this one was a yes for me.  This setting spray is infused with amber, which I loved and it smells amazing.  The one thing I didn’t like was how it sprayed, the sprayer thing was just bad, if you don’t hold it a decent amount of space from your face be ready to be showered.  That was a little over-dramatic, but it definitely did spray me enough to make me have to dab the excess off.

cp setting spray

So as far as this setting spray, I liked it and would probably try a different kind of ColourPop setting spray just not this particular one.

Rating: 3/5

03 IT Cosmetics Bye Bye Under eye Concealer $26

I absolutely love this concealer, I have been using it for a while now and have already re-purchased it.  The creamy formula makes it perfect for the under-eye area as well as for cutting the brows etc.,  it also offers a ton of coverage.  I use the shade neutral medium and it works well with my skin tone but I definitely could have gone lighter.

it concealer

This is a great concealer that I will continue to use and definitely recommend for ya’ll to try out!

Rating 5/5

04 Makeup Revolution Pro Fix Illuminating Spray $8

I know what you’re thinking, yes another setting spray but guys I am addicted to setting spray. Literally, I spritz myself all throughout the day, which probably explains why I blow through it so fast.  I liked the way this spray set my makeup, and the sprayer did spritz an even mist onto my face, the only thing I didn’t like was the smell, it’s not bad but not pleasant either.

mr setting sp;ray

This product claims to have light reflecting particles for a natural glow and I really believe it is illuminating. Overall, this is a great affordable setting spray and I recommend this and the other Makeup Revolution setting sprays.

Rating 4/5

05 HD Flawless Translucent Setting Powder $7

I finished this powder surprisingly quickly, and unfortunately was not too impressed.  I chose the translucent shade because I wanted it to brighten/highlight parts of my face, but found it leaving an intense white-cast that was intensified in photos.  The powder does a decent job setting and mattifying the face, but instead of hiding my pores and fine lines it kind of accentuated them.

I just found that close up, this powder did not look very nice on the skin and was pretty cakey. I probably wouldn’t buy this again because it didn’t work for me, but if I did I would try a different shade.

Rating 3/5

06 Urban Decay Optical Illusion Primer $16-$36

I remember I originally purchased this when I noticed it had rosehip and argan oil in it, while I do not usually shop Urban Decay I decided to give it a try. I was pleasantly surprised with this primer, it lives up to it’s smoothing, pore reducing claims. I love the way my makeup applies over this primer, it helps create a smooth base for even makeup application.  The consistency of this primer is very smooth and it makes the skin super soft, immediately after application you will notice it filling your pores and fine lines.

ud primer

This primer is a little pricey, but in my opinion totally worth it!

Rating 5/5

07 Essence Get Big Lashes Mascara $4

I purchased this on vacation in Europe over the summer, I ran out of mascara and this one claimed to bring volume, curl and lash lifting effects.  At first I really liked the brush because it was dense with bristles, curved and quite large, but I found it made the lashes somewhat clumpy and was pretty messy.  The mascara smelled kind of bad too, not that I think a mascara has to smell good to like the product but this smell in particular was off-putting for me.

essence mascara

This mascara definitely came in handy in a pinch and I actually used it all the way up so it wasn’t terrible but not one of my favorites. You can read about my favorite mascara by Milk Makeup here.

Rating 4/5

Hopefully you enjoyed the products I’ve finished up this month! Join me on my journey to clearing out my beauty stash!

xoxo

-Frankie

Fake Eyelashes – Beginner Makeup Tutorial

Hey everyone!

So fake eyelashes have become a staple in my makeup routine, for someone with naturally straight and short lashes, strip lashes are a life saver! It is an easy and inexpensive way to add dramatic affect to your makeup and glam up your look!

I was definitely overwhelmed when I started applying strip lashes as it can be quite complicated of a task when you are first starting out. Which is why I am here, to explain all the tips and tricks I’ve learned through the years for applying strip lashes and making sure they stay on all day!

Types of Lashes

I wanted to start by explaining the different types of false lashes, if you go into a drug store, you will find a ton of different styles of strip lashes with all different types of bands.  There is also individual lashes, which mimic salon created lash extensions ( I also love doing these and will be doing a post on DIY lash extensions soon!)

When I mentioned lashes having different bands on them, I was referring to the actual strip that allows you to apply the lashes. It can be a thicker darker strip, which is more stiff and difficult to apply, or a thinner strip which is flexible and much easier to apply.

For beginners, I definitely recommend trying to stick to thinner bands, like in the second picture, so you have less trouble with lifting and attaching to your eye.

Along with the slightly different strips of lashes, there are tons of different styles of lashes all creating different effects on the eye. Some of my favorite styles of lashes are wispy lashes which create a flirty affect usually by a thinner amount of lashes made up of different sized lashes, cat-eye style lashes grow longer towards the end creating a similar look to winged liner.

There are also different materials that lashes are made up that can create different effects, these are the most common that I have found.

wispy lashes
Synthetic Lashes: Dark black color of the lash, more dramatic and slightly shiny.

3D Lashes
3-D Lashes, different lengths and sizes of lashes, creating a full and wispy affect, lots of lash definition and curl,

mink lashes
Mink Lashes: Silky feeling, very fluffy and soft, offer a flirty and more luxurious look

human hair lashes
Human Hair Lashes: probably the most natural effect, mimics how real lashes would look, blends well with natural lashes,

Now that you are familiar with the different styles and materials you are ready to pick out your perfect lashes and apply them!

Eyelash Application

So all you really need to apply lashes is lash glue, which sounds simple but as there are many types of lashes there are also many types of glue. One thing to make sure is that you DO NOT purchase the glue for individual lashes and use it for strips, it will ruin your natural lashes.  Lash glue usually comes in a brush on form or in a tube, I usually prefer it in a tube because I think it is easier to apply an even layer of glue. Lash glue also comes in a dark color that dries black, or white which dries clear.  Black lash glue is perfect if you are wearing eyeliner to blend in the lashes, but can be messy, white to clear glue is very user friendly and my personal favorite

I have been using DUO lash glue for years, it lasts all day, comes in dark and white and the actual product will last you a long time all for like $6!!

Make sure when you are applying the glue, that you apply a thin layer evenly across the lash strip, you want the glue to begin drying and become tacky before you apply the lash.  If the glue is not dry enough the lash will move around and not stick, if the glue is too dry you won’t adhere the lash securely.

lash glue

Another good tip, especially if you have super long nails like me, is to use eyelash applicators.  I have been using this pair by Japonesque for years, you can read my full review of them here.  Lash applicators make it easier to get your fingers in there without struggling or accidentally stabbing yourself in the eye..

Another tip is, if the lash is too long and doesn’t sit comfortably on your eye I recommend trimming it to fit, or you will struggle all day with the lash poking you or lifting in the corners.

As far as the actual application of the lash, I usually adhere the middle first and then attach the inner and outer corners. This has just been the easiest technique for me, but through trial and error you will find out what works for you.

Once the lash is on, I use my lash applicators to squeeze the lash to my natural lashes making sure it is fully secured.

And now you have fierce & flirty lashes, I hope you enjoyed and leave a comment of your favorite false lashes! I love trying out new lash styles!

Here’s some pics of me wearing strip lashes!

lashes 01lashes 02lashes 03lashes 04

xoxo

-Frankie

DIY Full Set Purple Vibes Dip Powder Nail Tutorial

So recently I did a post explaining the basics of the nail dip powder system. Learning to do my own nails has saved me so much money and has become something I really enjoyed doing! I love expressing myself through my nails, learning new techniques and personalizing my manicure.

In this post, I’ll be taking you step by step through my full set application. For the basics on how to dip your nails read my Beginner dip nail tutorial.

So my inspiration today was purple, my boyfriend recently bought me a bunch of glitter for my nails and this purple one was totally calling my name!!

I always do my nails over paper towel, if you’re messy like me take precautions. I also wear a mask over my nose and mouth to prevent myself from inhaling any dust through dipping or filing.

1. Apply dip powder to nails

Even though I am doing purple nails I used my Kiara Sky Clear dipping powder because it’s my favorite, feel free to use any color!

I apply 3 coats of the dip system before sealing it. When you first start out you might need to get the hang of it before you get an even, smooth dip every time. Also make sure you brush off the excess powder in between dips, I go through this in detail in my previous post.

Here’s my nails, first second and third dip

2. File and shape

Once I sealed in the dip, I file my nails so they are smooth. Like I said, once you get the hang of it, you will have to do less work filing, I pretty much just go over the whole nail to make sure it’s smooth.

3. Paint

Now it’s time for the fun part, I decided to do one glitter nails, 2 camouflage nails and the rest purple. The first thing I did was the glitter, I love glitter but it’s a mess and it stresses me out.

I applied a layer of clear nail polish and then poured the glitter over the nail and allowed it to dry. Once the glitter nails dried I encapsulated it with a thin layer of clear acrylic. I prefer to encapsulate glitter in acrylic versus dip powder because I found my clear powder dulling the glitter a little.

I painted the rest of my nails with two coats of Ciate’s Paint Pot polish on Spinning Teacup. It’s a beautiful pale lavender shade.

I chose the nails I wanted a camo design on and painted the two I was leaving purple with a clear coat.

This camo design is super easy, you just choose a few colors in your color palette, I almost always add black and white as well. I use a set of small paint brushes from Walmart, all these brushes are really useful when doing your nails but for this I specifically used the thin pointed pencil brush.

These are the polishes I chose : Sinful Colors in Tempest, Trust Fund Beauty’s Zero Carbs, Deborah Lippmann in Love Hangover plus a black and white polish.

Like I said camouflage nails are super easy you just paint different shaped and colored blobs, lol, I usually do about 3 spots of each color and then fill in any empty spots with black or white.

4. Top Coat and Bling

Make sure your design is COMPLETELY dry before top coating or it will run and get smudged. Once it dried, I top coated everything and decided to apply a couple stones to my plain nails.

I really love how these nails came out!!! I hope you try out camo nails or dip powder, if you do definitely send me your manis!!

Xoxo

-Frankie

Trip to the Balkans – Travel Series Pt.1

This series is my travel diaries from my trip to Europe touring the Balkans, I worked with Treasures Tours on the Adriatic Adventure Tour through the beautiful countries of Montenegro, Bosnia-Herzegovina, Albania and Croatia.

I began my journey in Stara Pazova, Serbia before meeting with the rest of the group. I was in awe at the beauty of Serbia leaving the airport, we stayed at the Hotel Vila Sunce which was walking distance from the cultural town center.

Our first full day in Serbia began with a visit to a local outdoor produce market Zelena Pijaca after breakfast where we sampled different Serbian delicacies, held some baby chicks and got to meet some amazing local people. After enjoying some gelato, we embarked on our day trip to the Srem District of Serbia, specifically Sremski Karlovci also known as the city of wine culture and spirituality.

This beautiful city lies on the coast of the Denube river and we toured a local fishing dock and restaurant, Dunav, where we enjoyed a beer while the owner caught our lunch.  While we waited for our fresh lunch to be prepared, we took a walk through the historic town admiring it’s architecture and style.

frank n sunflowers

After filling up on freshly caught fish, we made it back to the hotel to relax before taking a trip by car to the lively city of Belgrade, Serbia. Belgrade immediately caught the attention of the shopaholic in me, the streets lined with shoe stores and boutiques.  After shopping around and enjoying the scenery we grabbed a light dinner, for my dad just cake, at a restaurant with outdoor seating in the center of the city.

adriatic adventure 2018-0019

With our stomachs full, we made our troop back to Stara Pazova to rest, in the morning we began our drive to Bosnia-Herzegovina.  The first city we visited in Bosnia was Sarajevo, we stayed at a lovely hotel that was a quick walk over a bridge to the city filled with local merchants, cafes and the occasional hookah lounge. We toured through the old part of town, Baščaršija, and enjoyed Cevapcici a Bosnian minced meat served with onions in bread.

adriatic adventure 2018-0005

Adriatic Adventure 2018-0004.jpg

After more shopping, be prepared for a good amount of shopping throughout this trip, we stopped for Turkish coffee and Rose lemonade at an indoor/outdoor beautiful cafe. For lunch we enjoyed soup, shopski salad and goulash from Nanina Kuhinja in Sarajevo.


Our third day in Sarajevo was sadly our last, we started the day with a formal tour of the old part of the city before hopping on the bus and traveling to Mostar, Bosnia where we stayed at Hotel Villa Milas, walking distance to the Stari Most. The Stari Most is a reconstruction of a bridge that was destroyed during war.


We walked the old bridge and toured the historic town of Mostar, Bosnia, and ate dinner at the Hindin Han restaurant overlooking the water where they served large platters of different meats, vegetables and of course french fries.


We started off the next morning with a stunning hike to a castle up a mountain overlooking Polcitelj, Bosnia, the view was definitely worth the exercise and ruining my sandals.


Still not 100% sure we were allowed to tour the castle ruins but we showed ourselves up.

adriatic adventure 2018-0294adriatic adventure 2018-0299adriatic adventure 2018-0305

Our mid-afternoon gelato provided us with energy for the next event for the day, visiting Kravice Falls. These waterfalls are something you must see if you’re traveling in Bosnia, especially in the summer, it is a great place to swim on a hot day! We swam, had a burger and a beer while enjoying the beautiful sunny day.

adriatic adventure 2018-0326adriatic adventure 2018-0336adriatic adventure 2018-0339

We enjoyed our last night in Mostar by embracing it’s nightlife, enjoying some drinks and taking in the scenery before we arrived in Albania.


We were welcomed into Albania by yet another feast, as we arrived at our hotel after a long day of driving.  Our hotel, overlooking the city of Kruje was in the center of town, right next to the markets, the fifth century castle and museum and of course another little hike.


After walking through the Albanian history museum, and taking in the views from the top of the mountain, we re-fueled with espresso before heading into town to check out the shops and cafes!

adriatic adventure 2018-0487adriatic adventure 2018-0518adriatic adventure 2018-0520

I hope you enjoyed part one of my Adriatic Adventure, stay tuned for part two where we finish up our stay in Albania and travel to Montenegro and Croatia, finishing up this trip in Slovakia!

Also make sure to check out Treasures Tours for all inclusive tours of the Adriatic, Slovakia, Mongolia and India!

xoxo

Frankie

Favorite Beauty Products – January 2019

I started 2019 off with so many new products, I pretty much switched up my whole makeup/skincare routine & girl it payed off.

Some of these favorites are products I’ve used for years along with some things I’ve recently picked up.

I hope you find some new products to try out!

Duvolle Face Brush $95 (I used a code that made it about $20)

duvolle.jpg

This face brush is a GAME CHANGER ladies, I actually just got it for Christmas but I have been using the exfoliating attachment on my face daily and it really did clean out my pores! Along with the exfoliating head it comes with a body brush (which is also bomb), a pumice stone and a facial cleansing brush with much softer bristles which I have not used yet.

# step up ya skincare 2019

Elf Brow Cream in Medium Brown $4

2019-01-05 (2)

You shouldn’t even think twice about this one, GO GET YOU ONE. I have been using this brow pomade since the summer and I’m still on the same pot, it’s long lasting and so pigmented! and $4!

*I definitely could have gone a shade lighter with this but the Medium Brown still works on me.

Trust ya girl on this one..

Physician’s Formula Butter Bronzer in Sunkissed $8.99

physicians formula 01.jpg

Another product I have been using for a few months that you need in your life! This bronzer is so smooth (like butter), it blends out flawlessly and the best part is it smells like coconut.

Seriously I could eat it..

I also recently learned they have a Butter Blush and Butter Highlighter collection which I got my sister for Christmas and she loves.

Milk Makeup Kush Mascara $24

milk makeup 03.jpg

This is my absolute favorite mascara, not just for this month, and not just because of the name..

If you don’t know already I am a huge fan of Milk Makeup and a cannabis supporter so when I found this mascara which conditions your eyelashes using cannabis oil I was hype.

Long story short this is a great mascara for lengthening the lashes & adding volume.

MAC Shiny Pretty Things Skinfinish in Snowflushed $35

mac 01.jpeg

I got this highlighter for Christmas and it changed my life… if you saw my January product reviews you know I was obsessed with my Cover fx highlighting drops but this highlighter is BLINDING

Honestly my explanation won’t even do this highlight justice, girl take my word from it and check this highlighter out it’s literally stunning.

Colourpop Yes Please Eyeshadow Palette $16

colourpop  01.jpg

Yet another product you need in your life, I tend to migrate toward browns, oranges and yellows on my eyes so this palette was perfect for me. Colourpop shadows are so affordable and pigmented you really can’t go wrong.

This palette has a beautiful combination of matte and glitter shades so it is perfect to create so many eye looks!

colourpop 02.jpg

I hope you enjoyed my favorite products this month & I hope you check some of these out!!

xoxo

-Frankie

2019-01-05 (2)